Create A Real Time Chat App With Pusher In PHP

Create A Real Time Chat App With Pusher In PHP

Almost every developer has created a chat application early in the career. Oftentimes, this app is used by the friends and family to chat with the developer. However, chat applications have now progressed way beyond the student project stage. Many businesses use a chat app to communicate in real time with the customers and other stakeholders.
real time chat app in php
Keeping the importance of real-time chat applications in business (and the fun of developing these apps), I decided to develop a chat app based on Pusher. This app works in real time and ensures almost instant communication among the users.

Prerequisites and the Process

The Pusher based app has the following prerequisites and development steps:
  1. Setup a Pusher account & get the API keys.
  2. Install Pusher & jQuery
  3. Add the Code
  4. Test the App in several browsers
Note: If you first want to see a quick demo of the chat app, scroll down to the end of this article.

Setup Pusher Account & Get API Keys

Pusher is a popular option for adding real time functionality to applications. To use it, sign up for an account through a GitHub or a Gmail account.
Next, create an application and select the following option for setting up the application. For the cluster option, select the closest location to your target audience.
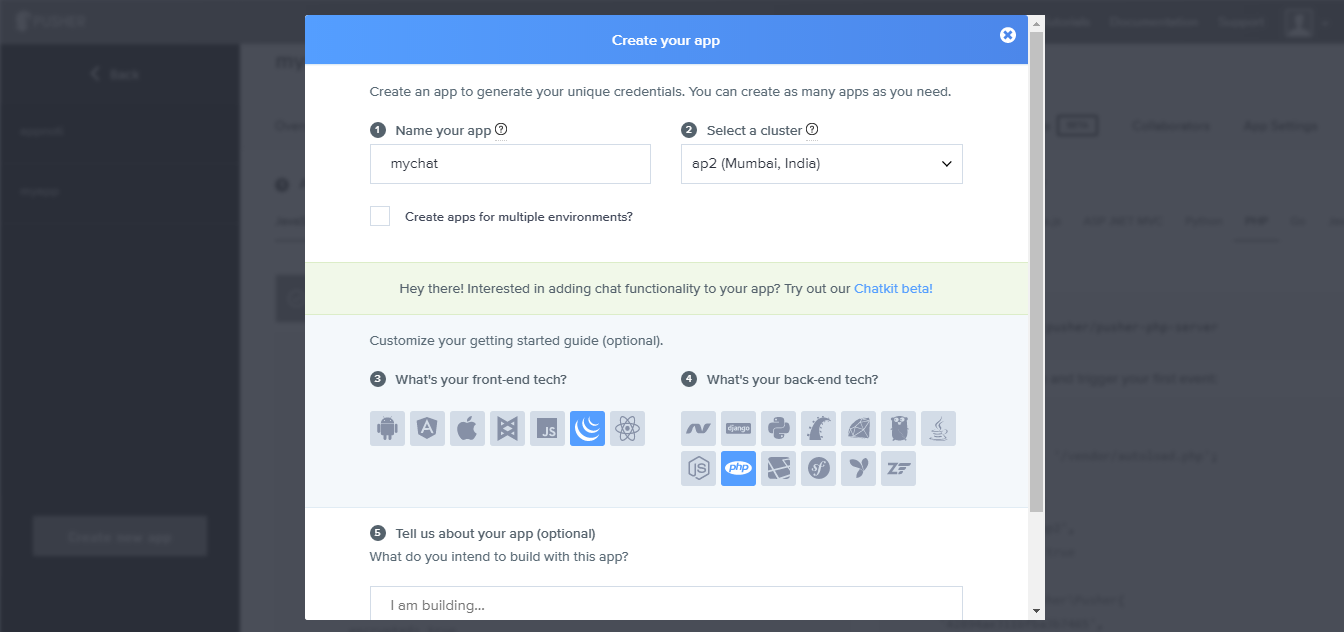
Now click the Create App button at the bottom of the screen. Your application will be ready in a moment and you could see demo code examples. Here you can also create API Credentials for use in the PHP application.
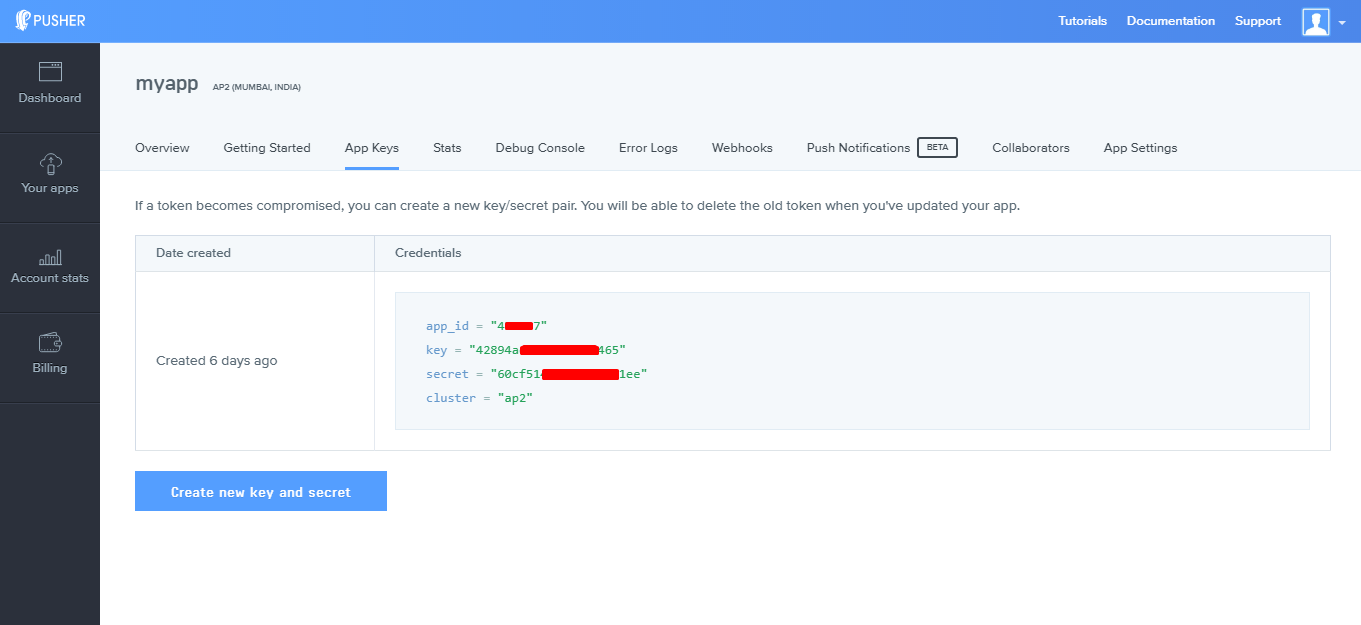
You can also create new credentials if you want to remove the old ones. You also have access a console where you could see the application stats, debug the app and check out Pusher error logs.

Install Pusher & jQuery

Fortunately, Pusher already has a built in PHP library for interacting with it’s HTTP API. The library was created by Kevin, a software engineer at Pusher. You can download or clone it from Github. However, I believe Composer is the right way to installing the library.
Login to your Cloudways accounts and launch the SSH terminal. Net, go to the application’s public_htmlfolder and run the following command:
This command will install the HTTP API library and allows you to use the Pusher’s HTTP functions in the application.

Add Code to the App

The code of this application is super easy because Pusher offers very simple logic(s).
Start by creating the index.php file. I will use Bootstrap to create a simple form with custom CSS. Next I’ll add jQuery functions with AJAX to send get the response from the PHP file. To help you understand the code better, I have added comments throughout the code. The flow of the code will be:
  1. Add scripts and links to the header
  2. Create a basic Bootstrap form
  3. Enable Pusher by passing the API key
  4. Enter a unique channel for subscription and event binding
  5. Create AJAX call to send and receive data to message.php file
  6. Trigger Enter key click event to send a message.
<!DOCTYPE html>
<head>
<title>Pusher Test</title>
<link rel="stylesheet" type="text/css" href="http://maxcdn.bootstrapcdn.com/bootstrap/3.3.1/css/bootstrap.min.css" />
<script src="//ajax.googleapis.com/ajax/libs/jquery/1.11.2/jquery.min.js" type="text/javascript" ></script>
<script src="https://js.pusher.com/4.1/pusher.min.js"></script>
<script src="//maxcdn.bootstrapcdn.com/bootstrap/3.3.1/js/bootstrap.min.js" type="text/javascript" ></script>
<script src="//cdnjs.cloudflare.com/ajax/libs/bootbox.js/4.3.0/bootbox.min.js" type="text/javascript" ></script>
<style = "text/css">
.messages_display {height: 300px; overflow: auto;}
.messages_display .message_item {padding: 0; margin: 0; }
.bg-danger {padding: 10px;}
</style>
</head>
<body>
<br />
<!--Form Start-->
<div class = "container">
<div class = "col-md-6 col-md-offset-3 chat_box" id="chatbox">
<div class = "form-control messages_display"></div>
<br />
<div class = "form-group">
<input type = "text" class = "input_name form-control" placeholder = "Enter Name" />
</div>
<div class = "form-group">
<textarea class = "input_message form-control" placeholder = "Enter Message" rows="5"></textarea>
</div>
<div class = "form-group input_send_holder">
<input type = "submit" value = "Send" class = "btn btn-primary btn-block input_send" />
</div>
</div>
<!--form end-->
<script type="text/javascript">
// Enable pusher logging - don't include this in production
Pusher.logToConsole = true;
// Add API Key & cluster here to make the connection
var pusher = new Pusher('42894ae311bfba3b7465', {
cluster: 'ap2',
encrypted: true
});
// Enter a unique channel you wish your users to be subscribed in.
var channel = pusher.subscribe('test_channel');
// bind the server event to get the response data and append it to the message div
channel.bind('my_event',
function(data) {
//console.log(data);
$('.messages_display').append('<p class = "message_item">' + data + '</p>');
$('.input_send_holder').html('<input type = "submit" value = "Send" class = "btn btn-primary btn-block input_send" />');
$(".messages_display").scrollTop($(".messages_display")[0].scrollHeight);
});
// check if the user is subscribed to the above channel
channel.bind('pusher:subscription_succeeded', function(members) {
console.log('successfully subscribed!');
});
// Send AJAX request to the PHP file on server
function ajaxCall(ajax_url, ajax_data) {
$.ajax({
type: "POST",
url: ajax_url,
//dataType: "json",
data: ajax_data,
success: function(response) {
console.log(response);
},
error: function(msg) {}
});
}
// Trigger for the Enter key when clicked.
$.fn.enterKey = function(fnc) {
return this.each(function() {
$(this).keypress(function(ev) {
var keycode = (ev.keyCode ? ev.keyCode : ev.which);
if (keycode == '13') {
fnc.call(this, ev);
}
});
});
}
// Send the Message enter by User
$('body').on('click', '.chat_box .input_send', function(e) {
e.preventDefault();
var message = $('.chat_box .input_message').val();
var name = $('.chat_box .input_name').val();
// Validate Name field
if (name === '') {
bootbox.alert('<br /><p class = "bg-danger">Please enter a Name.</p>');
}
else if (message !== '') {
// Define ajax data
var chat_message = {
name: $('.chat_box .input_name').val(),
message: '<strong>' + $('.chat_box .input_name').val() + '</strong>: ' + message
}
//console.log(chat_message);
// Send the message to the server passing File Url and chat person name & message
ajaxCall('http://phpstack-71265-406587.cloudwaysapps.com/message_relay.php', chat_message);
// Clear the message input field
$('.chat_box .input_message').val('');
// Show a loading image while sending
$('.input_send_holder').html('<input type = "submit" value = "Send" class = "btn btn-primary btn-block" disabled /> &nbsp;<img src = "loading.gif" />');
}
});
// Send the message when enter key is clicked
$('.chat_box .input_message').enterKey(function(e) {
e.preventDefault();
$('.chat_box .input_send').click();
});
</script>
</div>
</body>
view rawIndex.html hosted with ❤ by GitHub
Next, create another file named message.php which will check the received message and then return it via the Pusher API. Here is the code to include in the file:
<?php
require __DIR__ . '/vendor/autoload.php';
// Change the following with your app details:
// Create your own pusher account @ https://app.pusher.com
$options = array(
   'cluster' => 'ap2',
   'encrypted' => true
 );
 $pusher = new Pusher\Pusher(
   '42894xxxx1bfbaxxxx65',
   '60cfxxxxfa4031bxxxxe',
   '45xxx07',
   $options
 );
// Check the receive message
if(isset($_POST['message']) && !empty($_POST['message'])) {
  $data = $_POST['message'];
// Return the received message
if($pusher->trigger('test_channel', 'my_event', $data)) {
echo 'success';
} else {
echo 'error';
}
}
view rawmessage.php hosted with ❤ by GitHub
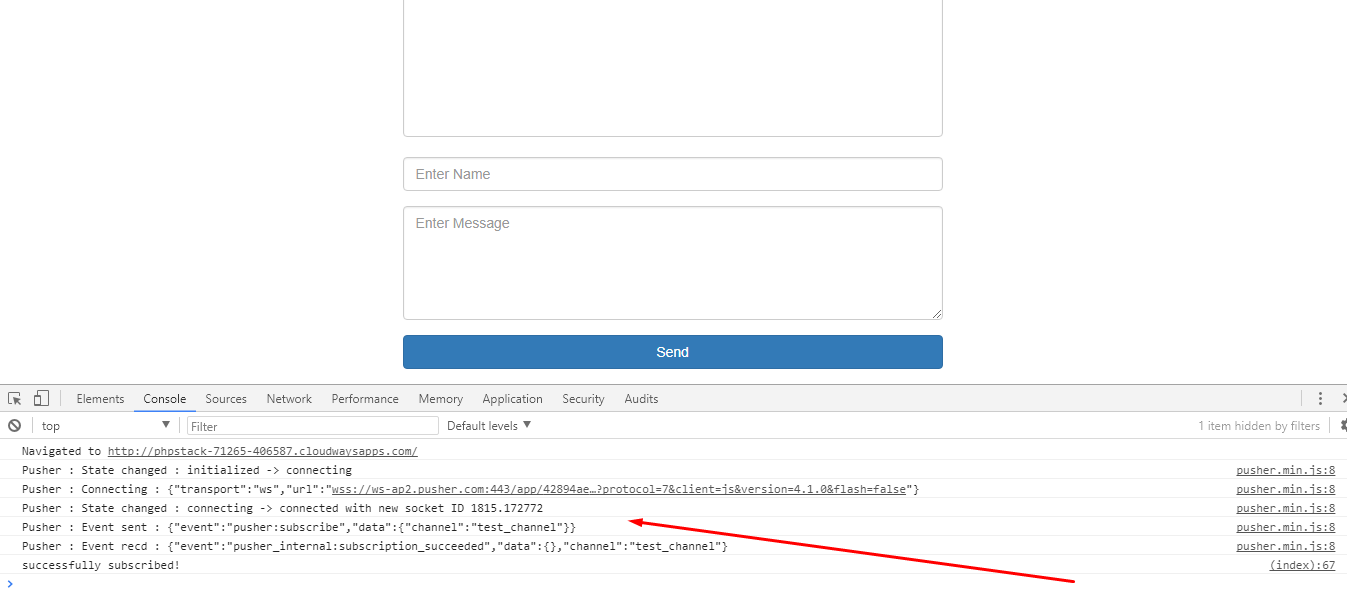
Once you have added both files to the application, open it in the browser and move to console in the terminal. You will see Pusher response with connection state and subscribed channel.
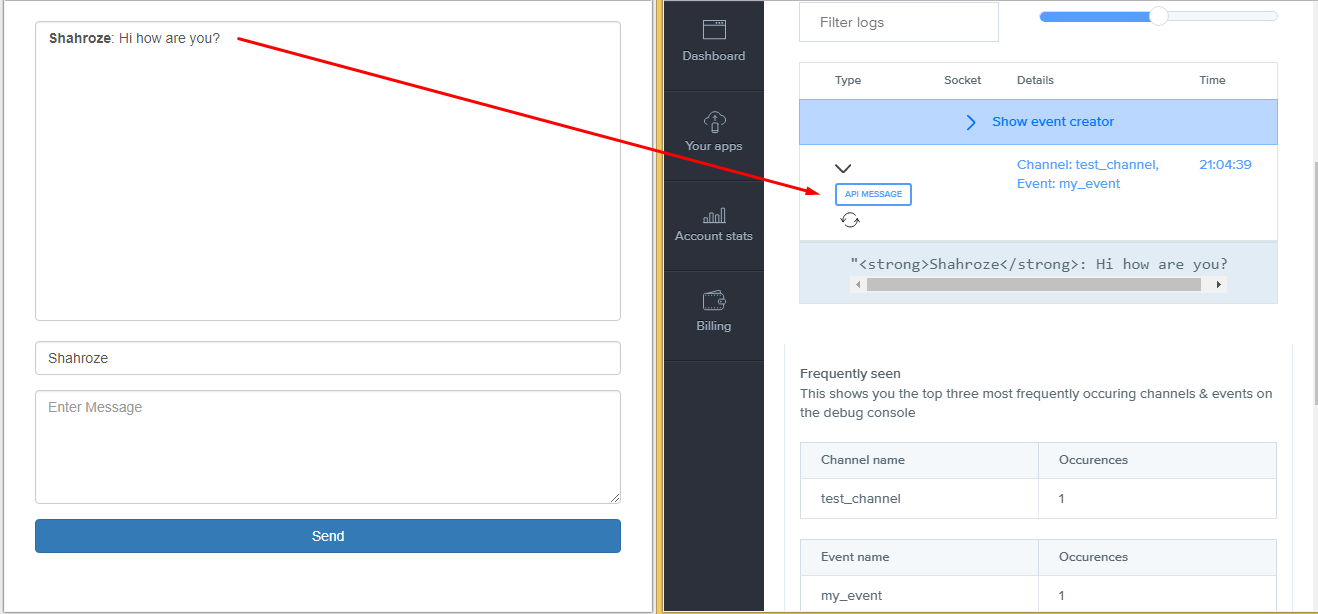
The following screencap shown how the triggered API call will look like in the Pusher console.
Test the App in Popular Browsers

The Chat App is finally ready. The next step is to test it in different browsers to ensure a uniform level of performance across the browsers. Here is a GIF that highlights the testing process:

Comments