Simplify Your Online Payments With Laravel Stripe Payment Gateway Integration

Payment gateways are an essential operational component of any ecommerce store. It completes the payment mechanism of any ecommerce store and allows users to make hassle-free online payments. In this regard, store owners really haven’t got much choice as the top tier of payment gateways is populated by a handful of names including Stripe and PayPal. Both of these platforms provide easy, secure & fast payment services, and are mostly recommended by the majority of the store owners.
Laravel Stripe has built a reputation of being easy-to-use for both developers and store owners. Because of great compatibility with Laravel, Stripe has become the go-to payment gateway for Laravel ecommerce stores. With a host of features and simple Stripe payment gateway integration in Laravel, many development agencies have opted for Stripe as the default payment gateway option for all ecommerce stores they develop for their clients.
Another important reason for the popularity of Stripe is that it accepts all globally accepted credit and debit cards, thus facilitating payment collections from all over the world. In short, Stripe provides a complete solution for online payment processing requirements for Laravel powered ecommerce stores.
Is Stripe Better than PayPal?
For many ecommerce developers, PayPal is the standard against which they evaluate all other payment gateways. Thus, “ Is Stripe better than PayPal?”, is a common question in many Laravel discussion forums.
To settle this debate, I have decided to compare both the options on five key parameters and make the case in Stripe’s favor.
Transaction and Service Fees
Stripe charges a low fee of 2.9% + 30¢ per successful transaction as long as the overall store turnover remains under $1 million. While this rate varies from country to country, there are no major differences.
While PayPal also charges the same base fee of 2.9% + 30¢ per successful transaction, but it deducts some extra fees that add to the overall cost of doing business.
Security
Watertight security of the overall payment process is among the core reasons of the success of both Stripe and PayPal. Both payment processors ensure easy-to-implement security measures that enhance the overall store security. Stripe offers Stripe.JS, a highly optimized security-focused program that is designed to allow users to collect credit card information without storing anything on the servers.
Payment Processor API
At the moment, Stripe offers one of the finest APIs in the payment processor niche. In fact, the recent PayPal API has borrowed several elements from the Stripe’s API in order to remain competitive. The strengths of Stripe’s API include a simple interface, great documentation and overall ease-of-use. The best part – Stripe offers libraries in all popular languages including PHP, Python, Java and C# to ensure that the users do not have to switch dev infrastructure to use the API. Most of the times, Laravel Stripe payments are not handled on the store’s servers.
Migration and Data Portability
The real test of portability is when you try to migrate away from the payment processor. In the case of PayPal, you run the risk of losing a significant number of your customers. On the other hand, Stripe offers a zero-risk migration to any PCI-compliant platform, without any restrictions on data portability. PayPal doesn’t allow migration of customer credit card data, adding a significant burden to your migration efforts.
Customer Service Issues
While PayPal has greatly improved its customer services (and the days of infrequent email replies and slow phone support are mainly over), it still has a lot of ground to cover before it could be compared with Stripe’s prompt customer support experience. In fact, a large number of users who move away from PayPal mention customer services to be inadequate for their purposes.
Stripe’s success on this front is mainly the result of its roots in entrepreneurship where the customer always comes first and the service offerings are tailored to meet market demands. A good example of the diversity in Stripe’s support is the IRC channels dedicated to Laravel Stripe connection where engineers and expert users help solve user issues.
In this article, I will demonstrate Stripe payment gateway integration in Laravel. The idea is to cover the process in sufficient details so that anyone looking to integrate Stripe with Laravel powered ecommerce stores can easily follow along.
Prerequisites
To begin this Laravel Stripe tutorial, I assume that you have a Laravel application installed on a web server. My setup is:
- Laravel
- PHP 7.x
I have used a Cloudways managed Laravel server to host my application because of the optimized dev stack. In addition, I don’t have to worry about server management hassles and thus could dedicatedly focus on my project.
Start by Setting up Stripe
The first step involves the setting up of the payment gateway. Begin by completing the registration process at the Stripe’s website and you will get access to the trial version of Stripe API. Once your account is live, you will see the following page in the browser:
Verify your email and you will get access of your Stripe dashboard. Here you can check the API and Secret keys in the Developers tab. In the tab, click the API Keys and you could see the private, secret key credentials and other related information.

Stripe Configuration with Laravel
The next step is the integration of Stripe with your Laravel app. For this, launch the SSH terminal and enter the following command:
- composer require stripe/stripe-php
Here’s the output of the command:
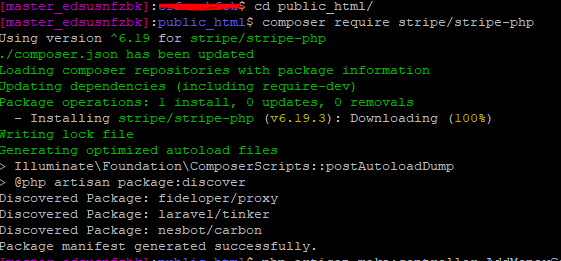
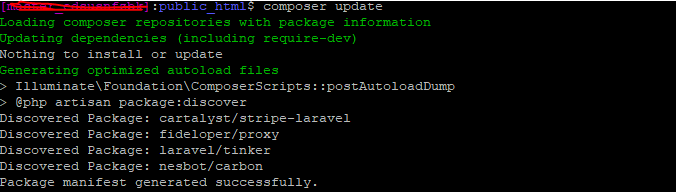
Once the installation of Stripe finishes, update the package.json with the following command:
- "cartalyst/stripe-laravel": "7.0.*"
Setup App Service Provider For Laravel Stripe Integration
Next, edit the following two lines in the config/app.php file.
- ‘providers’ => [
- ….
- Cartalyst\Stripe\Laravel\StripeServiceProvider::class,
- ],
- ‘aliases’ => [
- ….
- ‘Stripe’ => Cartalyst\Stripe\Laravel\Facades\Stripe::class,
- ],
Set up Private and Secret Credentials
Now that everything has been updated, it is time to setup the credentials. Open the .env file and paste the following two variables. Remember to get the values for both the variables from your Stripe dashboard (see the first step):
- STRIPE_KEY=pk_test_xxxxxxxxxxxxxxxxxxx
- STRIPE_SECRET=sk_test_xxxxxxxxxxxxxx
Setup Stripe Payment Controller
Now set up the Stripe payment controller through the following command:
- php artisan make:controller MoneySetupController
Note that I have created the controller with the name MoneySetup controller. You are free to pick the name of your controller.
- <?php
- namespace App\Http\Controllers;
- use App\Http\Requests;
- use Illuminate\Http\Request;
- use Validator;
- use URL;
- use Session;
- use Redirect;
- use Input;
- use App\User;
- use Stripe\Error\Card;
- use Cartalyst\Stripe\Stripe;
- class MoneySetupController extends Controller
- {
- public function paymentStripe()
- {
- return view('paymentstripe');
- }
- public function postPaymentStripe(Request $request)
- {
- $validator = Validator::make($request->all(), [
- 'card_no' => 'required',
- 'ccExpiryMonth' => 'required',
- 'ccExpiryYear' => 'required',
- 'cvvNumber' => 'required',
- //'amount' => 'required',
- ]);
- $input = $request->all();
- if ($validator->passes()) {
- $input = array_except($input,array('_token'));
- $stripe = Stripe\Stripe::setApiKey(env('STRIPE_SECRET'));
- try {
- $token = $stripe->tokens()->create([
- 'card' => [
- 'number' => $request->get('card_no'),
- 'exp_month' => $request->get('ccExpiryMonth'),
- 'exp_year' => $request->get('ccExpiryYear'),
- 'cvc' => $request->get('cvvNumber'),
- ],
- ]);
- if (!isset($token['id'])) {
- return redirect()->route('addmoney.paymentstripe');
- }
- $charge = $stripe->charges()->create([
- 'card' => $token['id'],
- 'currency' => 'USD',
- 'amount' => 20.49,
- 'description' => 'wallet',
- ]);
- if($charge['status'] == 'succeeded') {
- echo "<pre>";
- print_r($charge);exit();
- return redirect()->route('addmoney.paymentstripe');
- } else {
- \Session::put('error','Money not add in wallet!!');
- return redirect()->route('addmoney.paymentstripe');
- }
- } catch (Exception $e) {
- \Session::put('error',$e->getMessage());
- return redirect()->route('addmoney.paymentstripe');
- } catch(\Cartalyst\Stripe\Exception\CardErrorException $e) {
- \Session::put('error',$e->getMessage());
- return redirect()->route('addmoney.paywithstripe');
- } catch(\Cartalyst\Stripe\Exception\MissingParameterException $e) {
- \Session::put('error',$e->getMessage());
- return redirect()->route('addmoney.paymentstripe');
- }
- }
- }
- }
Set up the Route
Finally, it is time to set up the routes. For this, open the routes/web.php file and paste the following code in it:
- Route::get('/', function () {
- return view('welcome');
- });
- Route::get('addmoney/stripe', array('as' => 'addmoney.paystripe','uses' => 'MoneySetupController@PaymentStripe'));
- Route::post('addmoney/stripe', array('as' => 'addmoney.stripe','uses' => 'MoneySetupController@postPaymentStripe'));
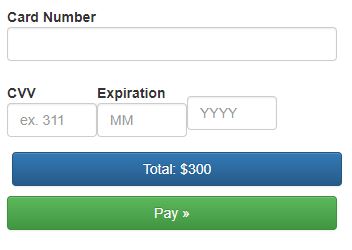
Set up Form View
It is time to create the view based on the Bootstrap classes. This allows building creative frontend forms and buttons.
Create a blade file and name it PaymentStripe.blade.php. Next copy the following code into this file:
- <!DOCTYPE html>
- <html lang="en">
- <head>
- <meta charset="utf-8">
- <meta http-equiv="X-UA-Compatible" content="IE=edge">
- <meta name="viewport" content="width=device-width, initial-scale=1">
- <!-- The above 3 meta tags *must* come first in the head; any other head content must come *after* these tags -->
- <title>Bootstrap 101 Template</title>
- <!-- Bootstrap -->
- <link rel="stylesheet" href="https://maxcdn.bootstrapcdn.com/bootstrap/3.3.7/css/bootstrap.min.css" integrity="sha384-BVYiiSIFeK1dGmJRAkycuHAHRg32OmUcww7on3RYdg4Va+PmSTsz/K68vbdEjh4u" crossorigin="anonymous">
- <!-- Optional theme -->
- <link rel="stylesheet" href="https://maxcdn.bootstrapcdn.com/bootstrap/3.3.7/css/bootstrap-theme.min.css" integrity="sha384-rHyoN1iRsVXV4nD0JutlnGaslCJuC7uwjduW9SVrLvRYooPp2bWYgmgJQIXwl/Sp" crossorigin="anonymous">
- <!-- Latest compiled and minified JavaScript -->
- <script src="https://maxcdn.bootstrapcdn.com/bootstrap/3.3.7/js/bootstrap.min.js" integrity="sha384-Tc5IQib027qvyjSMfHjOMaLkfuWVxZxUPnCJA7l2mCWNIpG9mGCD8wGNIcPD7Txa" crossorigin="anonymous"></script>
- <style>
- .submit-button {
- margin-top: 10px;
- }
- </style>
- </head>
- <body>
- <div class="container">
- <div class='row'>
- <div class='col-md-4'></div>
- <div class='col-md-4'>
- <form class="form-horizontal" method="POST" id="payment-form" role="form" action="{!!route('addmoney.stripe')!!}" >
- {{ csrf_field() }}
- <div class='form-row'>
- <div class='col-xs-12 form-group card required'>
- <label class='control-label'>Card Number</label>
- <input autocomplete='off' class='form-control card-number' size='20' type='text' name="card_no">
- </div>
- </div>
- <div class='form-row'>
- <div class='col-xs-4 form-group cvc required'>
- <label class='control-label'>CVV</label>
- <input autocomplete='off' class='form-control card-cvc' placeholder='ex. 311' size='4' type='text' name="cvvNumber">
- </div>
- <div class='col-xs-4 form-group expiration required'>
- <label class='control-label'>Expiration</label>
- <input class='form-control card-expiry-month' placeholder='MM' size='4' type='text' name="ccExpiryMonth">
- </div>
- <div class='col-xs-4 form-group expiration required'>
- <label class='control-label'> </label>
- <input class='form-control card-expiry-year' placeholder='YYYY' size='4' type='text' name="ccExpiryYear">
- <input class='form-control card-expiry-year' placeholder='YYYY' size='4' type='hidden' name="amount" value="300">
- </div>
- </div>
- <div class='form-row'>
- <div class='col-md-12' style="margin-left:-10px;">
- <div class='form-control total btn btn-primary' >
- Total:
- <span class='amount'>$300</span>
- </div>
- </div>
- </div>
- <div class='form-row'>
- <div class='col-md-12 form-group'>
- <button class='form-control btn btn-success submit-button' type='submit'>Pay »</button>
- </div>
- </div>
- <div class='form-row'>
- <div class='col-md-12 error form-group hide'>
- <div class='alert-danger alert'>
- Please correct the errors and try again.
- </div>
- </div>
- </div>
- </form>
- </div>
- <div class='col-md-4'></div>
- </div>
- </div>
- </body>
Once you have added the above view code successfully, you can see the form output in browser as how it looks in real time. In the above view form, i have used some bootstrap classes for desired form customization, you can use your preferred bootstrap classes for styling the form as per way you want. You could also use prebuilt bootstrap form templates in the above code which are particularly made to enhance the front-end creativity of the forms.
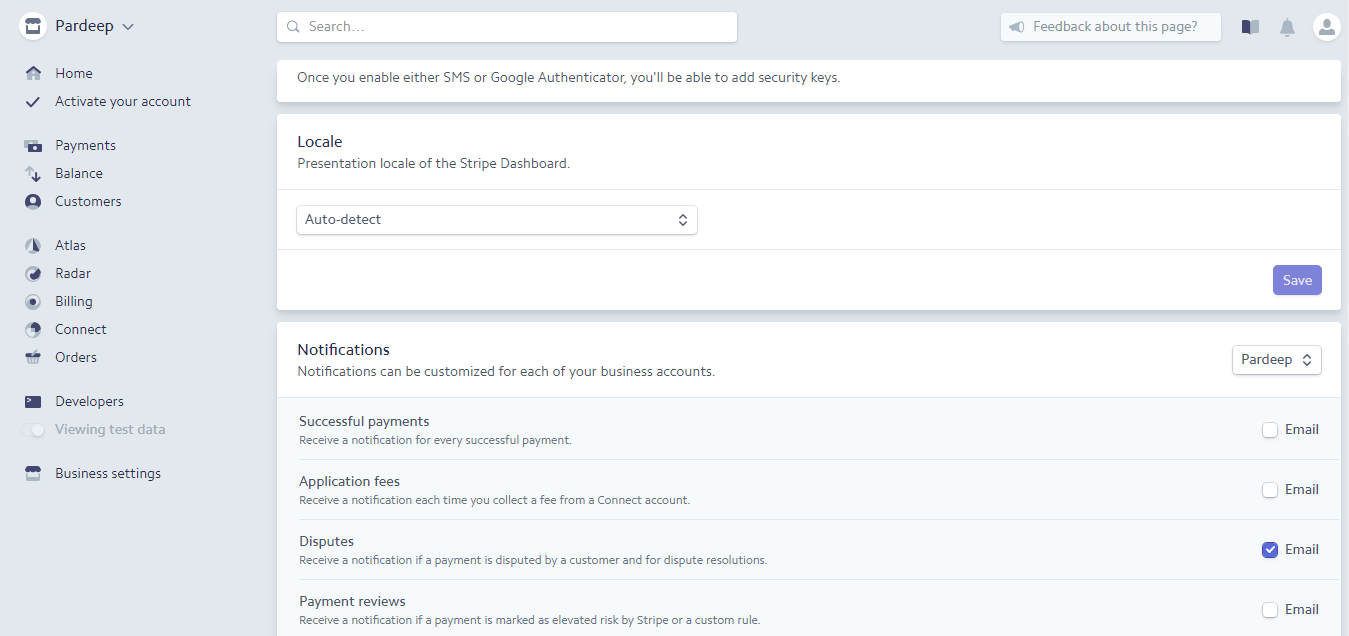
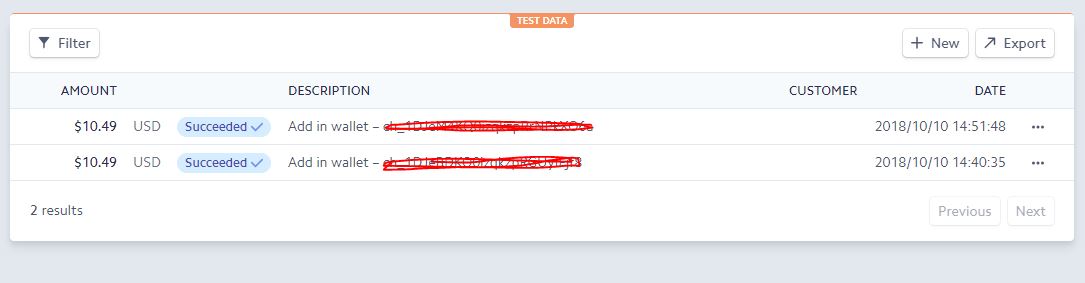
Stripe Payment Dashboard
You can see all the payment details and customer credentials in the Stripe payment dashboard. A panel creatively built to show you complete customer details including name, card number, amount details, date and other related information. The dashboard also has the export option given on top right corner, through which you can export all the records of the payments into a separate file. While the search option enables you to search the desired customer record in case of personalized record search.
Conclusion
In this tutorial, I briefly offered an overview of Stripe and how to integrate it in any Laravel application. The article also covered several important features that make Stripe a much better payment gateway than PayPal.
If you have any queries about the Laravel Stripe integration, feel free to ask your questions below in the comments section.
Comments
Post a Comment